Creating a Fancy Watch in Blender
Welcome to another Blender Mesh tutorial!
This time the tutorial is a text tutorial! Orginally it was supposed to be a video tutorial but it was not to be. Also, for the first time, there’ll be two things at the bottom; the best pictures created with the tutorial, and also some inspirational pictures that go with the tutorial. Enjoy!
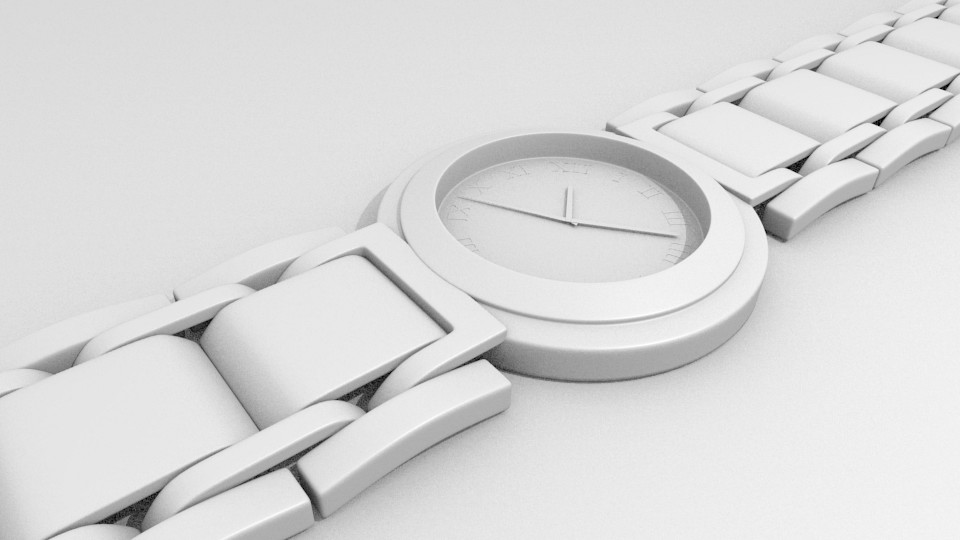
The final result:
The tutorial begins …
Start off by deleting the default cube.
Add a cylinder.
Shrink the cylinder down on the Z-axis to an appropriate size.
Go into Edit Mode and delete the middle top vertex of the cylinder.
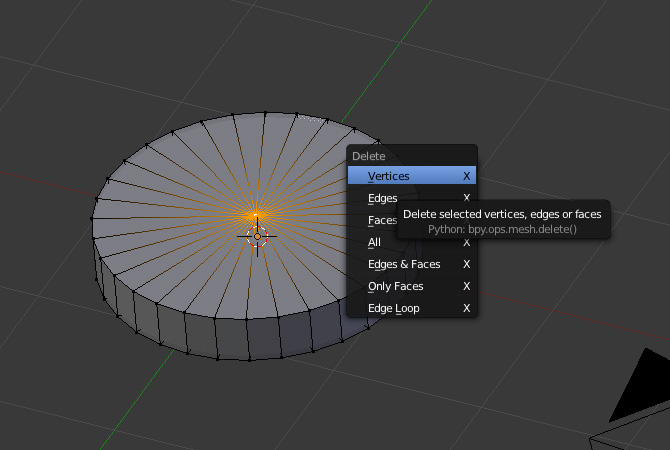
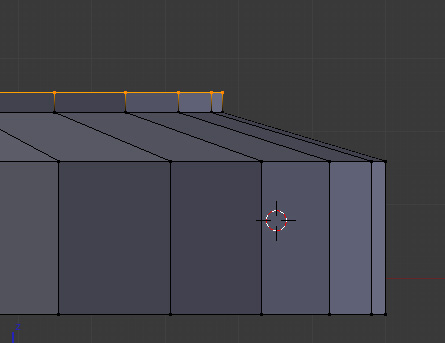
Extrude the top outer edge inwards about as much as shown, then raise the new edge slightly on the Z-axis.
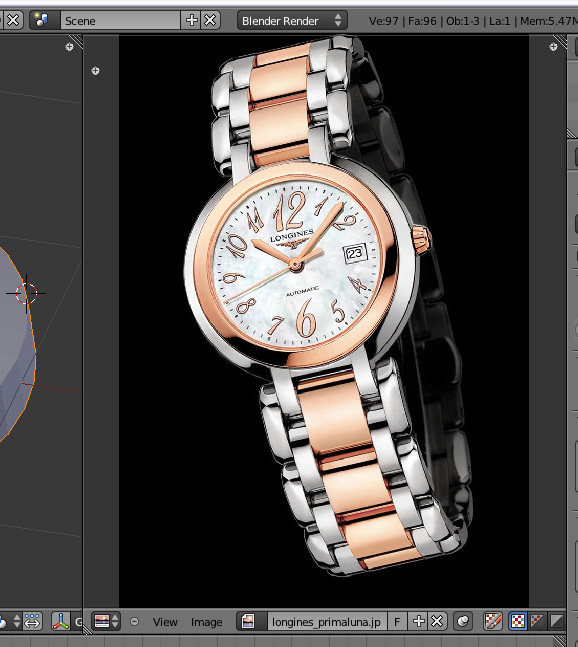
Also open up a reference picture so that your model is more accurate. Download the reference image here.
Next, extrude your edge upwards on the Z-axis a little.
Extrude that edge inwards about as much shown and raise it upwards a little on the Z-axis.
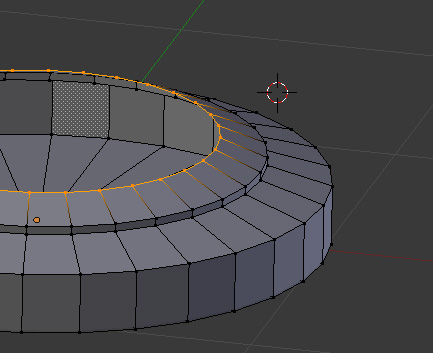
Then extrude downwards to create the inside of the watch face.
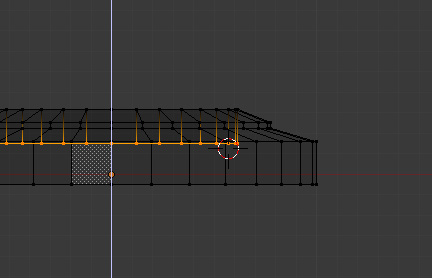
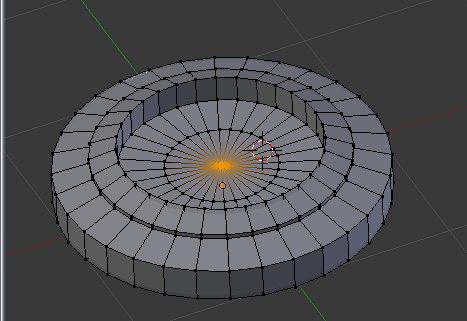
Lastly extrude inwards to create half the watch face, then extrude inwards again. Press Alt-M to merge the vertexes together.
Adjust the watch as needed to match up the reference image as much as possible.
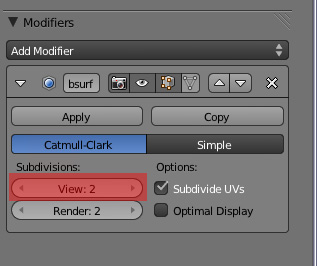
Add a subsurf modifier to the watch and set the view amount to 2.
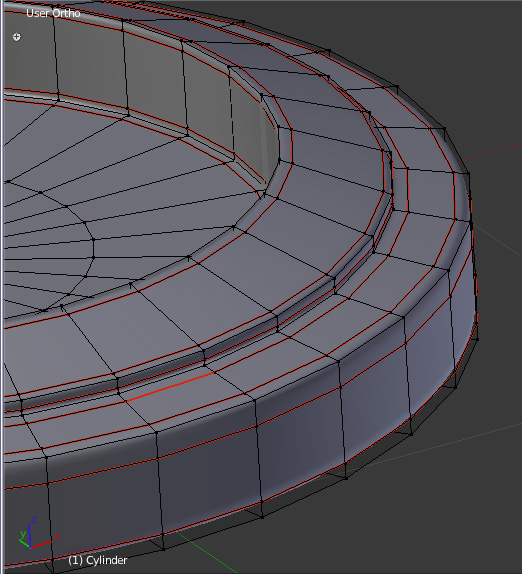
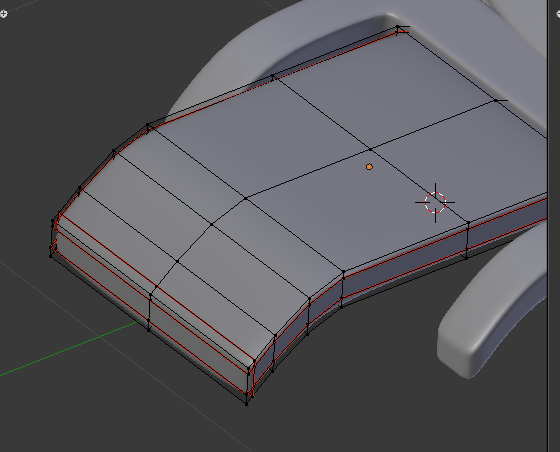
Add loop cuts to sharpen the edges of the watch. (The loop cuts added are marked as red.) Also shade the mesh “Smooth.”
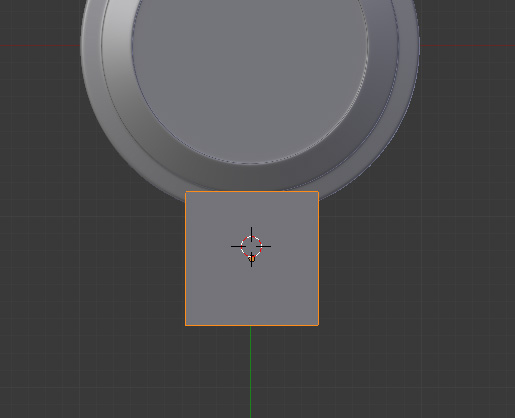
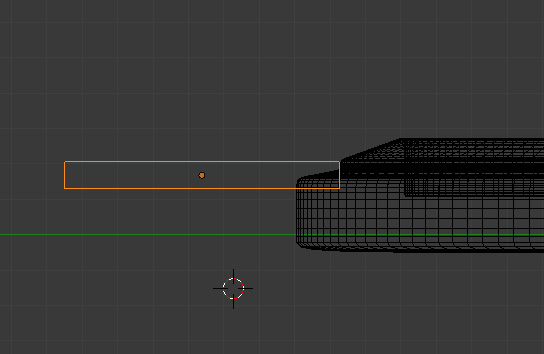
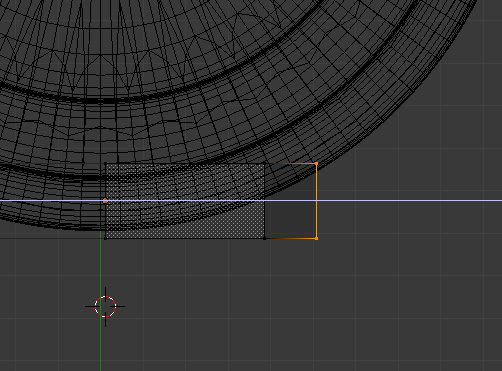
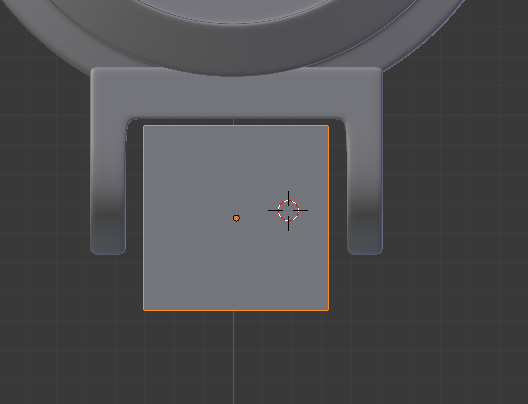
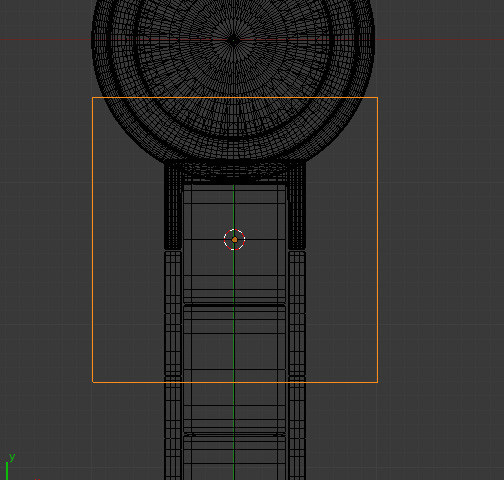
Now we need to model the watch band. Add a cube around the area the picture shows.
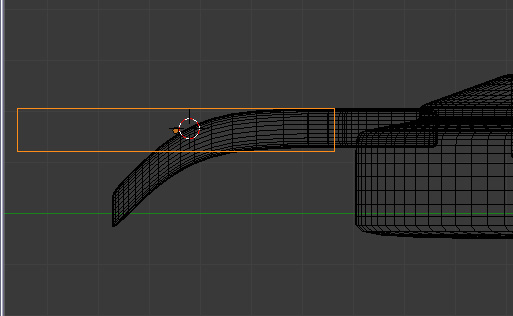
Scale the cube down on the Z-axis to make it much thinner.
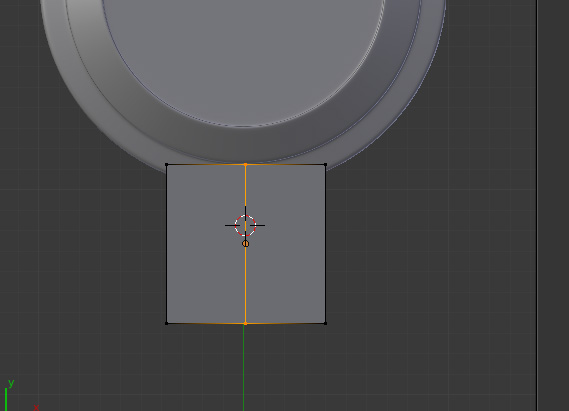
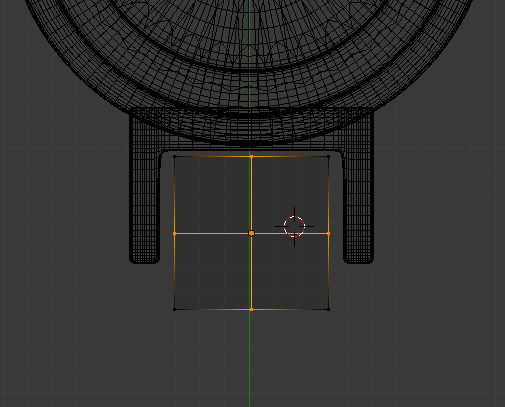
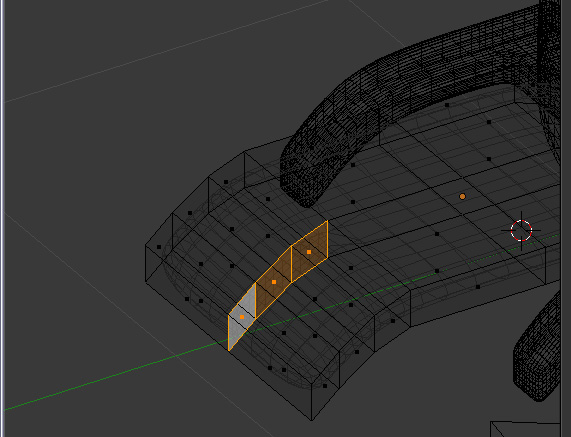
Add a loop cut in the exact middle of your cube (Press Ctrl+R, then left click).
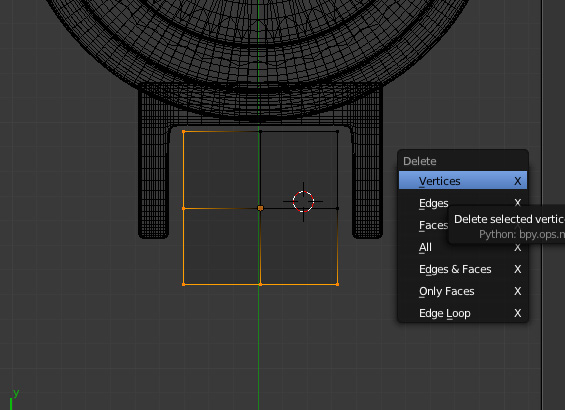
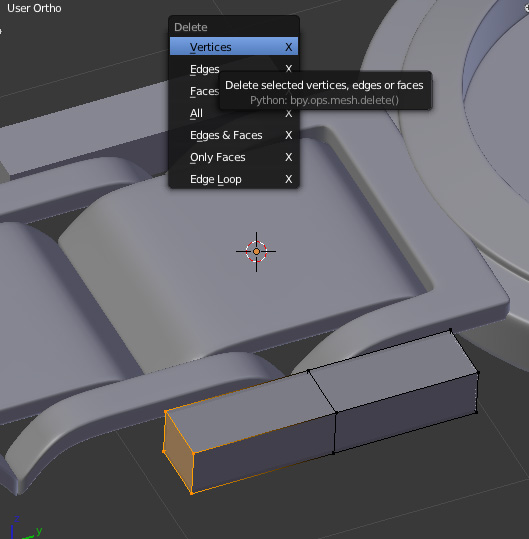
Delete the vertices selected.
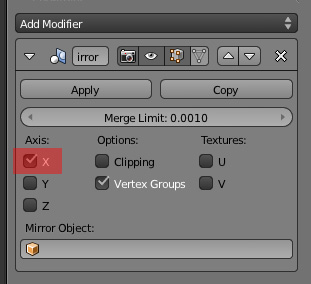
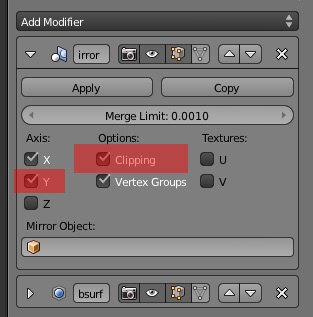
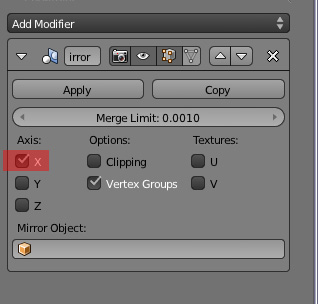
Add a mirror modifier and make sure that it’s mirroring on the X-axis. (Check “Clipping” if you don’t want the mirror to seperate from the mesh.)
Adjust the length of the band on the Y-axis until you reach a size similar to the picture’s.
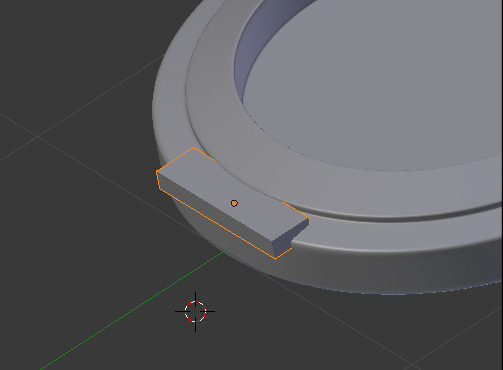
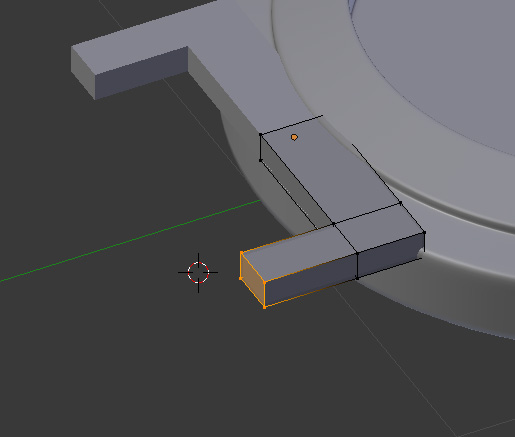
Take the right face of your cube and extrude a little.
Then extrude the bottom right face on the Y-axis.
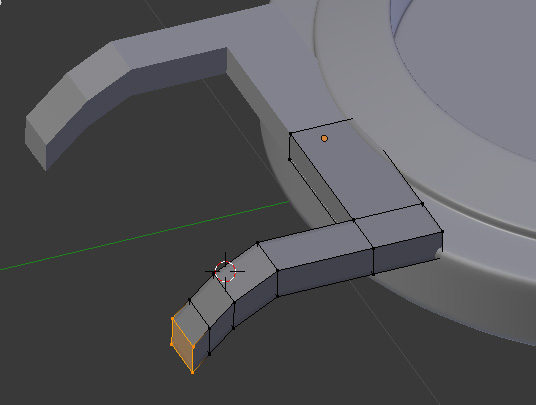
Then keep extruding on the Y-axis, and with each extrusion, bring the face down on the Z-axis, gradually.
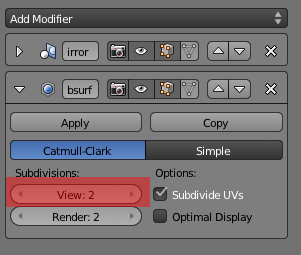
Add a subsurf modifier and change the view amount to 2.
Add loop cuts to sharpen the edges of the subsurfed mesh. Shade the mesh “Smooth.”
Now we need to model the center piece of our watch band. Add a cube in the center of the the watch band area you’ve just created.
Scale it down on the Z-axis to about the same thickness as the other piece of the watch band.
Add loop cuts in in the center of the cube on the X and Y axis’.
Delete the vertices selected.
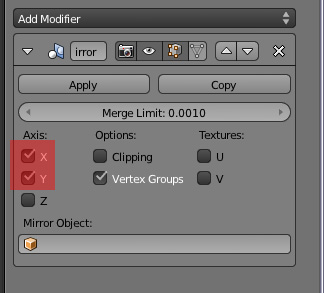
Add a mirror modifier and make sure both “X” and “Y” are checked. Check “Clipping” if you don’t want the mirror and the mesh to seperate.
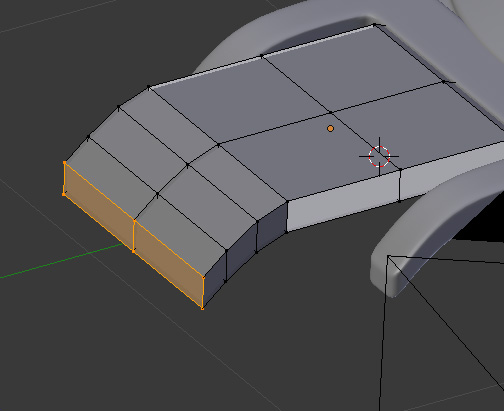
Extrude the cube face that is facing away from the mirror modifier similarily to the other cube watch piece you’ve just modeled before.
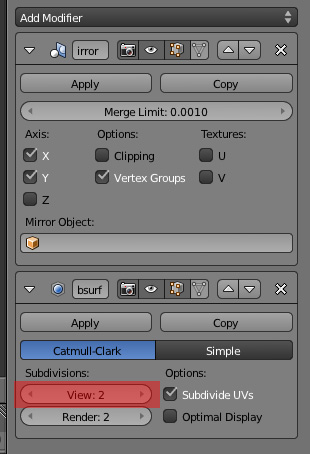
Add a subsurf modifier and change the view amount to 2.
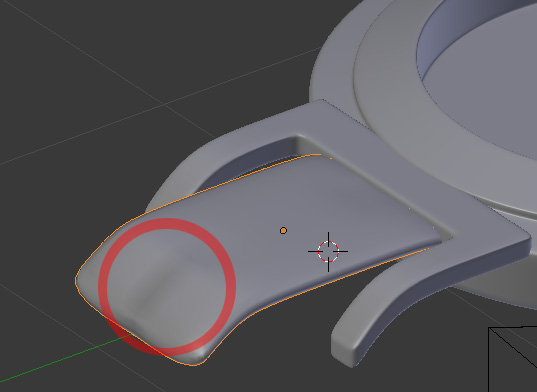
Once you shade the mesh smooth, however, you may experience the problem circled – a black line in the middle of your mesh which will show up in your render.
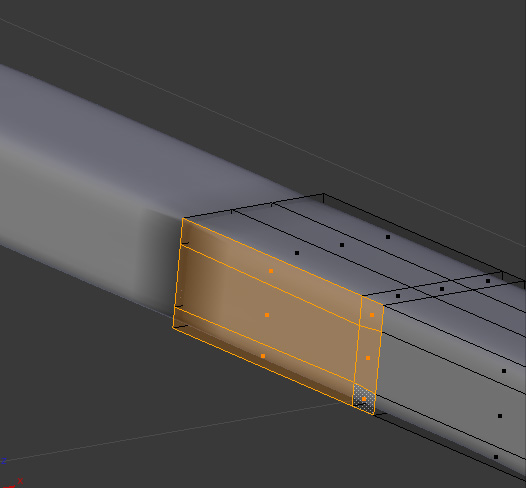
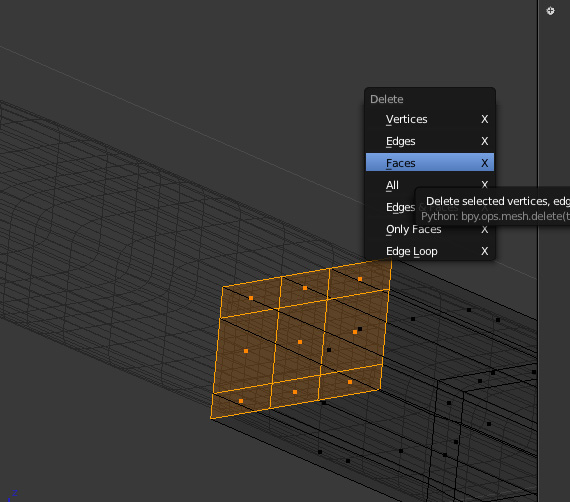
To fix the problem, delete the faces that are selected.
The mesh should now be clean. Add loop cuts to strengthen edges and shade the mesh smooth.
Duplicate the top part of the watch band by pressing Shift + D, then move it down on the Y-axis.
With this duplicated watch band piece, go to the mirror modifier (there should already be one) and check “Y” and “Clipping.”
Delete the vertices selected.
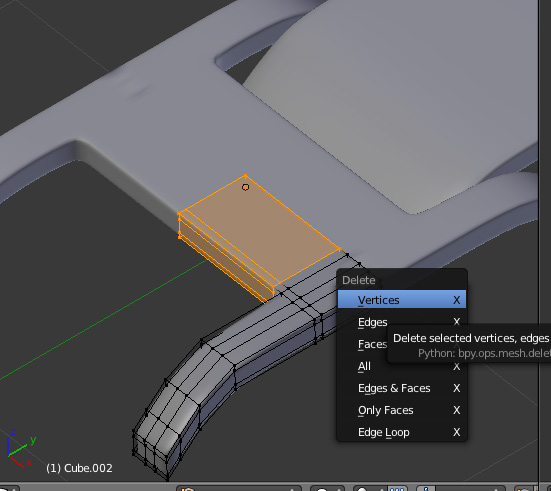
Create faces (you will need to extrude single vertices) in the selected area.
To remove the black area, delete the faces selected.
Your mesh should now be clean.
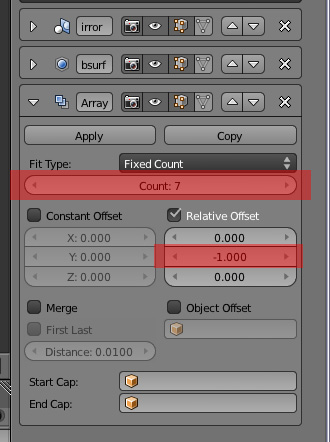
Add an array to the new watch band piece, change the array count to 7 (or however much you’d like), change the default “X” value of the relative offset to 0 and the “Y” value to -1. Do the same for the middle part of the watch band.
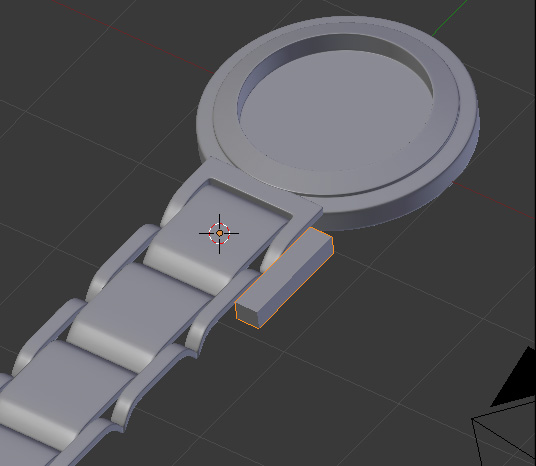
There’s one more piece of the watch band to create. Add a cube right in the center of the watch band.
In Edit Mode (not Object Mode) move and scale the cube to the area and size you see in the picture.
Add a mirror modifier and make sure it’s mirroring on the X-axis. The mesh should be mirrored on the other side of the watch band.
Add a loop cut in the center of the cube and deleted the vertices selected.
Add another mirror after the other mirror modifier. Uncheck “X” and check “Y.” Again, check “Clipping if you don’t wish the mesh and mirror to seperate.
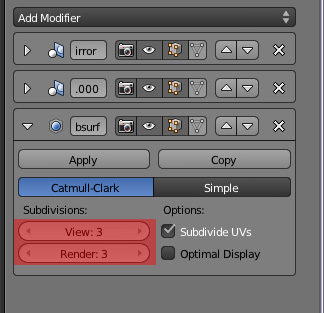
Add a subsurf modifier and set the view and render amount to 3.
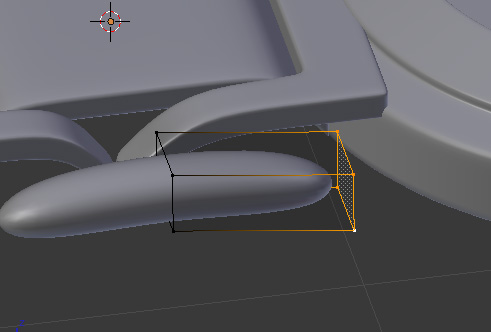
Take the selected face and bring it down on the Z-axis slightly.
Add loop cuts to sharpen the edges of the mesh.
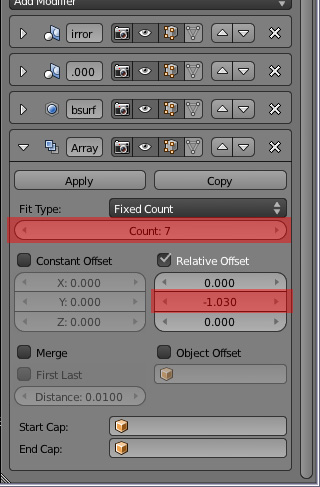
Add an array modifier and change the count to 7. Change the relative offset “X” value to 0 but change the Y to -1.03 so that there is a space between each array count.
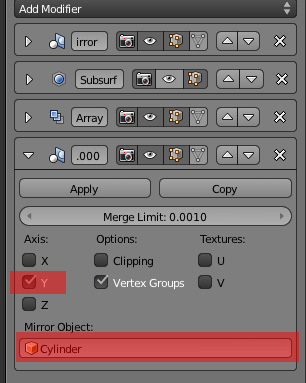
Now we need to mirror the entire watch band to the other side of the watch. For each part of the watch band, add a mirror modifier, uncheck “X.” and check “Y.” Then make sure you mirror each part of the watch band to the watch itself (The default name should be just “Cylinder”).
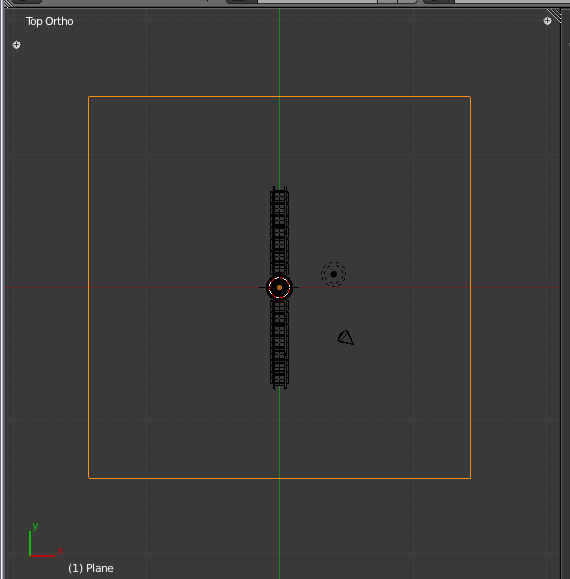
Now add the floor. Simply add a plane and make sure that the bottom of the watch just touches the plane. Make the plane pretty large as well.
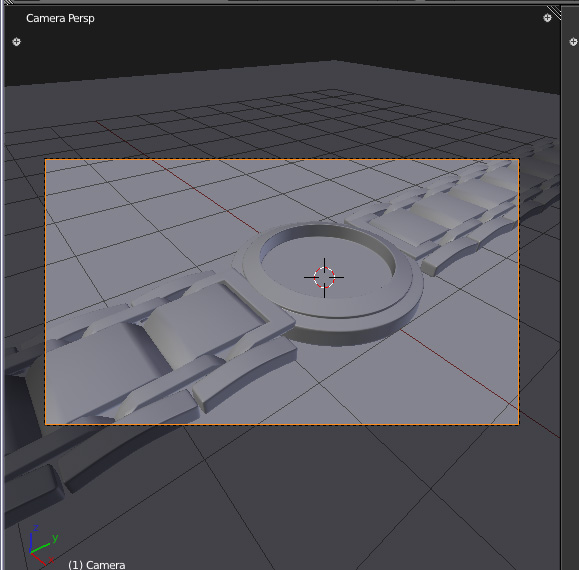
Also move the camera to a more appropriate view. I found that a focal length of 25 and a camera placement similar to what you see works well.
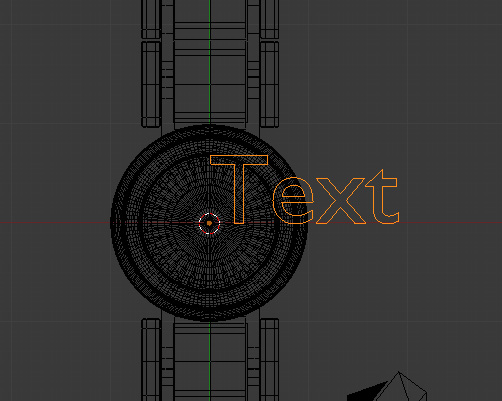
Now for the letters you see on the watch. There are two options you could do here. Use an image for the watch face, or create the text in Blender. We’ll create it in Blender. Select the watch, press Shift + S and press Cursor to Selected, then add a “Text.”
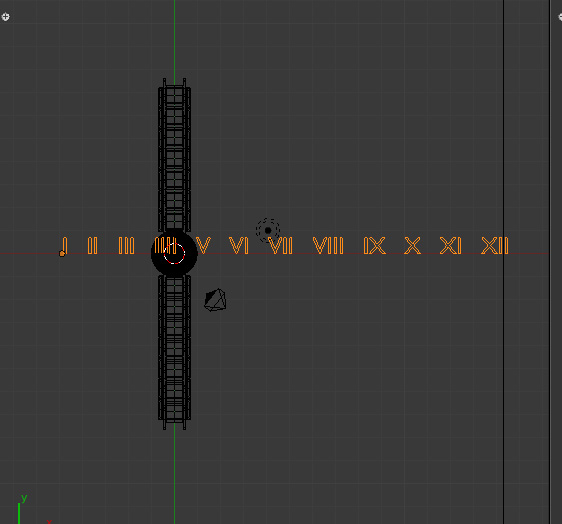
Obviously the words “Text” are no good. Press Tab to go into edit mode and start typing some actual words for the clock. You can type Roman numerals or plain old letters. I chose (for some variety) to use Roman numerals. After each number, press Spacebar three times to get some space between each number.
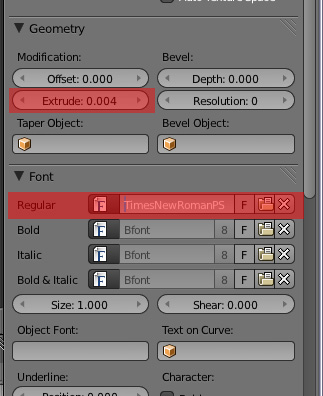
In the Font options, change the “Regular” font type to “Times New Roman.” (You can find your fonts at C:/Windows/Fonts – it may be different for different computers) Also set the Extrude amount to 0.004.
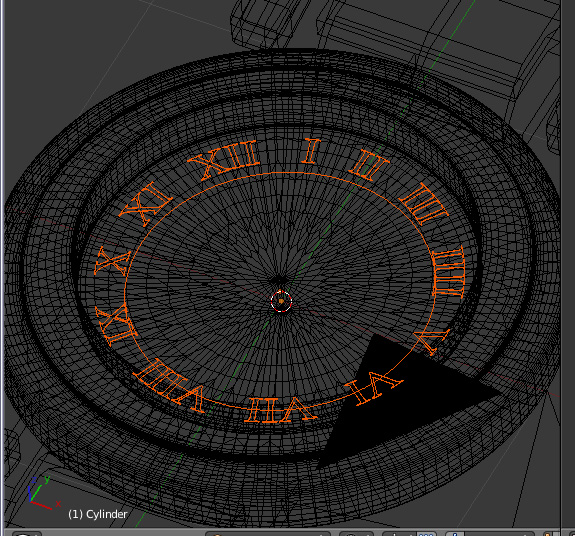
Now we need to curve the text on a Curve Circle. Add a Bezier Circle and add a Curve modifier to your text. Once you set the “CurveCircle” to be the target for the curve, the text is warped around the curve. Scale the text down until it looks the way it should. By grabbing and scaling, fit the bezier circle and the text to fit appropriately in the watch face.
Now we need to create the watch hands. Start off by adding a cylinder for the watch hands to sit on. Scale it down appropriately.
Shade the cylinder smooth and add an “Edge Split” modifier.
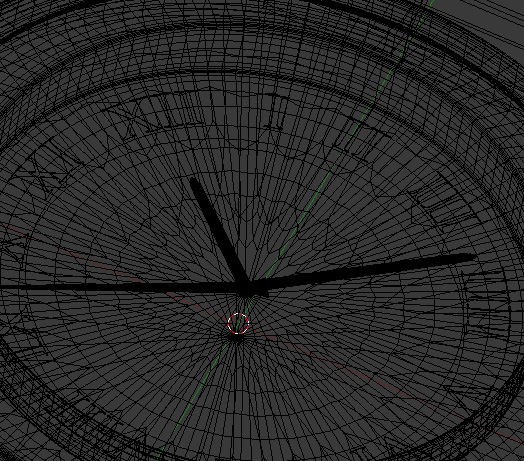
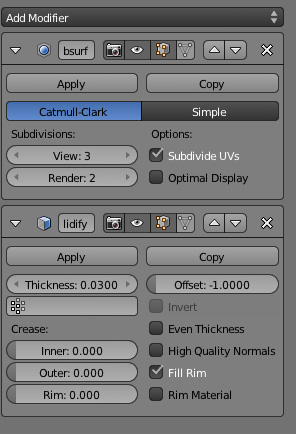
By adding planes, using subsurf and solidify modifiers, duplicating, and scaling, we create the watch dials.
That’s it for modeling! Now we’ll get into materials.
You should have a result similar to this by now:
Materials and Rendering
Start off by adding a new material to your center piece of your watch band.
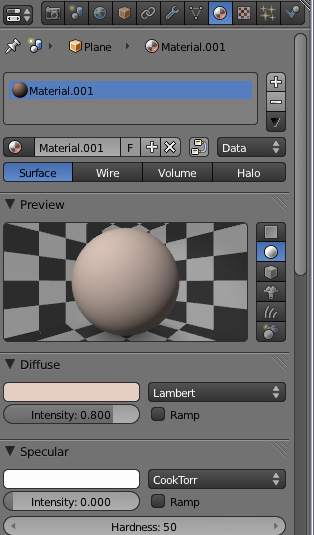
Set the specularity intensity of your material to 0, and check Mirror. Set the Reflectivity to 0.5 and the Gloss amount to 0.93. Lastly you need to change the diffuse color. If you aren’t sure what to use, use these color settings: R: 1.000, G: 0.306, B: 0.136. It will give you a peachy color.
Add a new material to a part of the watch that will be really shiny – the outer part of the watch band, perhaps. Set the specular intensity to 0, turn on Mirror, change the Reflectivity amount to 0.9, and the gloss amount to 0.97. Remember, the colors are referenced off the reference picture.
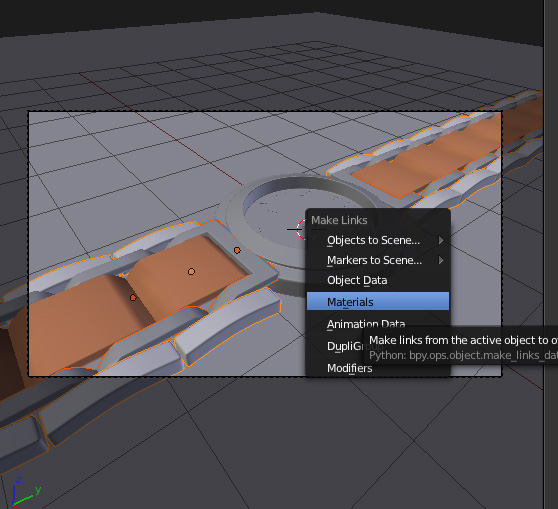
Now select all other objects that are supposed to be metal, and then select the object that already has the metal material. Press Ctrl + L and hit “Materials.”
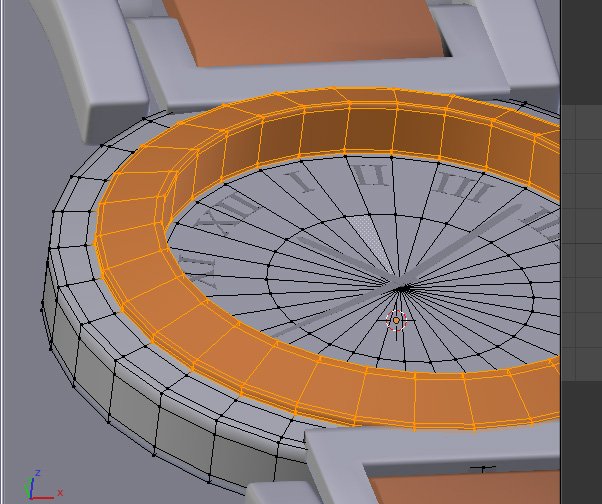
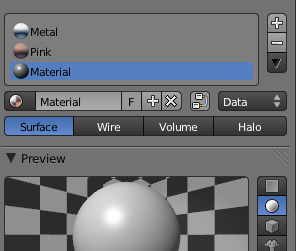
Now set the watch itself to be “Metal.” If you check out the reference picture you can see that part of the watch is the peach material as well. So we need to assign the peach material to the watch. Add the peach material to the watch materials (Press the “+” button, then add the peach material as a material), then go into edit mode, select all the edges that are supposed to be peach (they’re selected in the picture), then hit “Assign.”
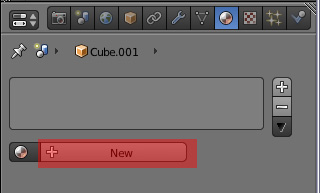
Press the “+” button for the watch material again, then delete the material, then press “New” to create a new material.
Go to the textures and add a new texture.
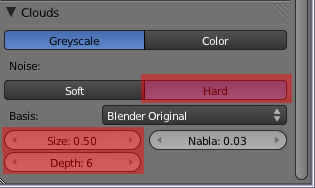
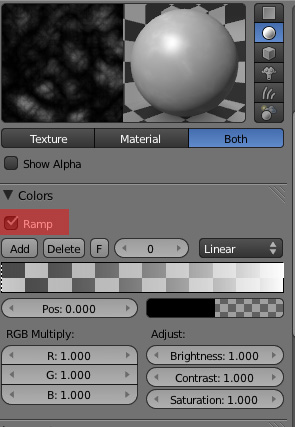
Keep the default cloud texture, but change the cloud type to “Hard,” change the cloud size to 0.5, and the depth to 6.
Go up to “Colors” and check “Ramp.” Leave all settings as default.
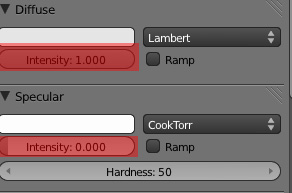
Go over to the materials panel and change Specularity Instesity to 0, and Diffuse Instensity to 1.
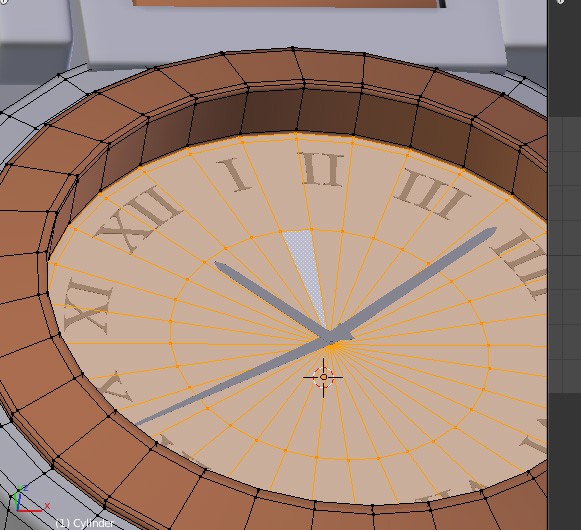
Go into Edit Mode and select the entire watch face edges and hit “Assign” in the materials panel with your new material selected.
Select the watch hands, the watch numbers, and the cylinder in the center of the watch face, then select a object that has the “Peach” material, then hit Ctrl + L – Materials.
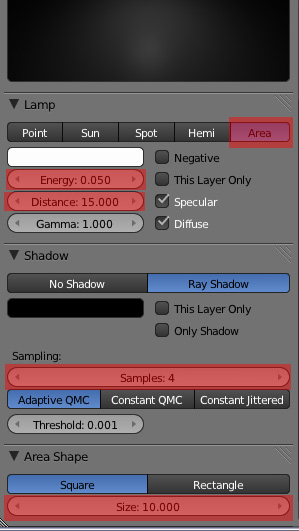
Now for the easy lighting. Change the default lamp to an area lamp. Change the energy to 0.05 and the distance to 15 (this will create dim lighting, for a brighter scene probably change the energy to 0.1!). Change the shadow samples to 4 for smoother shadows, and change the size of the area lamp to 10. Then duplicate the lamp.
You can give the floor a material as well, if you’d like.
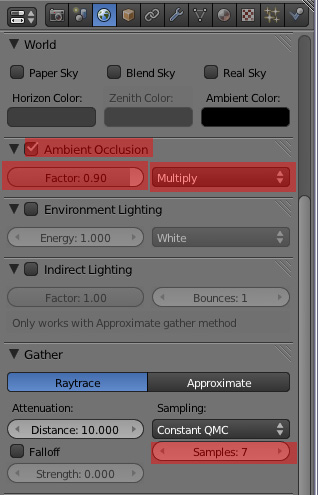
Go over to the World panel and check Ambient Occlusion. Change the Factor amount to 0.9 and change the factor type to Multiply. Lower down to the Gather area, change the samples to 7.
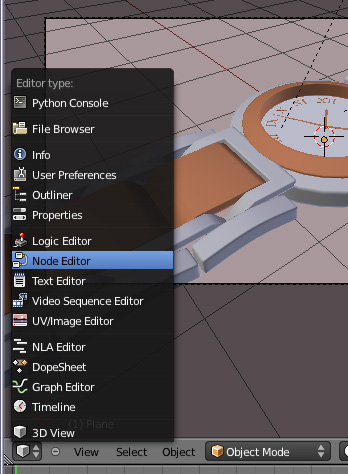
However now we are confronted with a problem which will make our watch look dull. Because there isn’t much more for the watch to reflect off of besides the floor, and because the world is a solid gray color, it will mostly reflect the dull gray and therefore look pretty dull. There is an easy way to make the watch look reflective, however. Head over to the node editor.
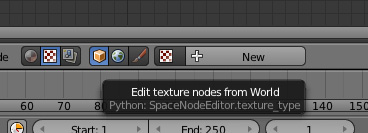
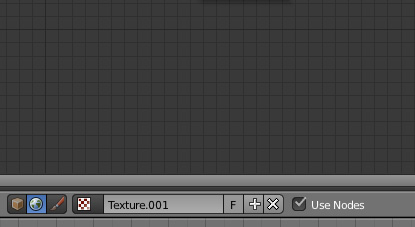
Hit the Texture nodes button (the button is checked red and white).
Hit the world button (it looks like a planet).
Hit the “New” button and also check “Use Nodes.” We’ll now be editing the world texture from the texture nodes area.
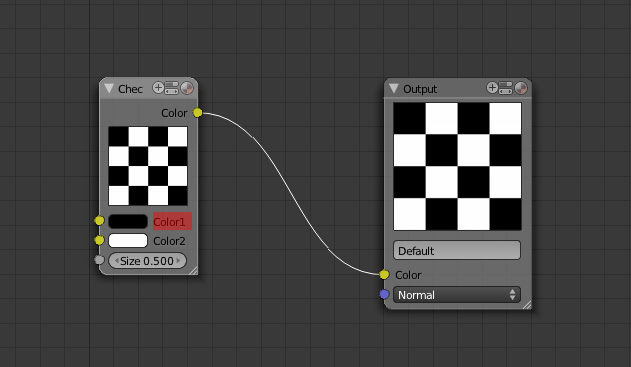
The default checked texture nodes will do fine. Just change the “Color 1″ color to black.
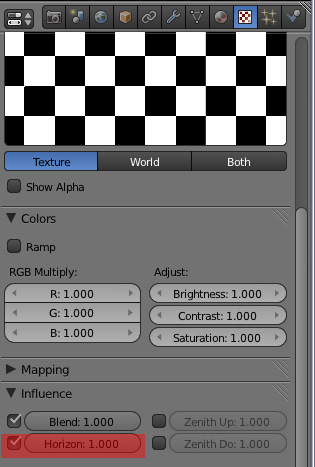
Now go to the world textures (To assure you get to the world textures, go to the World panel first and then go to the Texture panel). Go down to Influence and check “Horizon” to assure the checked texture shows up in the world.
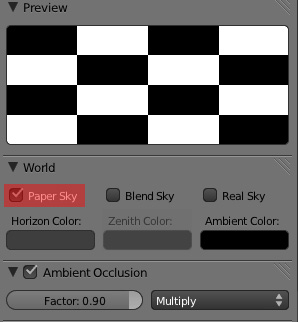
Go over to the World panel and check “Paper Sky” so the texture doesn’t come out distorted.
You are done with the tutorial! I hope you enjoyed it. If you give it a render, with some tweaking with lighting, camera placement, modeling, and other aspects of the picture, you should get a similar result to the final result.
I hope you enjoyed the tutorial! Here’s some inspirational pictures of fancy watches:
Watch (created in Blender)
When I get some renders from this tutorial I can post them here.



















Love it! took me around two hours to complete, took around twenty minutes to read the whole tutorial!
Nice quality pics and explained really well ;D thanks again!
Sorry that the materials part of it wasn’t updated, it is now
thanx.awesome tut. Am certainly going to use it in my current project
thanx. great tutorial and its in text form.im certainly goin to use it in my current prjct.
awesome, thank you
I made a few tweaks for my own render, but it looks fabulous! Thanks a bunch for the tutorial
One problem, this may be because i’m using 2.58 (stable), when I go to mirror the original cube band, it mirrors on the wrong side. Any way to fix this?
There could be a couple reasons for that, most likely is that your origin point is messed up (the orange dot which is assigned to each object), that’s very important for mirroring. It’s possible you’re mirroring on the wrong axis as well.
Really good and useful tut ^^ thanks Jahnu!
Great tutorial. I’m still working on it. But, if you are interested, I grabbed it and converted it to a PDF, if you want to add it as a downloadable file on here. Just holler at me and I’ll send it to you. Thanks for this great tutorial again!
Yeah sure, why not? That’d be nice. If you could link it somewhere and send it to me that’d be cool.
@Samnis The contact form is on the navigation bar, pretty much in plain sight. I’m a little careful about Facebook friending. Feel free to like my website though